Accessing Jupyter on iOS over HTTPS
In order to access a Jupyter server over HTTPS on your iPad or iPhone (in both Juno Connect and Safari), one needs to correctly configure server’s SSL/TLS certificate. Since issuing a proper certificate from a trusted authority could be challenging in some cases, a self-signed certificate should suffice, provided it was signed by a CA that is trusted by your iOS device.
Do I need this?
Please, mind that you only need SSL/TLS certificate if you plan to connect to your server over HTTPS; you don’t need a certificate for plain HTTP connection. Whether you should use HTTPS or plain HTTP depends on how you connect to your Jupyter Notebook server.
Typically, you should use HTTPS:
- If you have configured a public Jupyter Notebook server, and your intention is to access it directly from outside of your local network using its public IP address or hostname, as described here: Connect to Jupyter server directly.
Usually, you can use plain HTTP:
- If you establish an SSH tunnel with your server, and access Jupyter using port forwarding (see Connect to Jupyter server using SSH port forwarding). Most likely, you will be connecting to
localhostover secure tunnel, and can use plain HTTP. - If you would like to access a server which is in your local network — say, connected to the same Wi-Fi. Assuming your network itself is secure, it should be safe to use plain HTTP.
For HTTPS, please follow the steps below to prepare a self-signed SSL/TLS certificate, which will be trusted by your iOS device.
Prerequisites
The openssl library is required to generate your own certificate. Run the following command in your local environment to see if you already have openssl installed.
which openssl
# You should get something like /usr/bin/openssl if it's installed
If which command does not return a path then you will need to install openssl yourself.
| If you have… | Install with… |
|---|---|
| macOS | Homebrew: brew install openssl |
| Windows | Windows complete package .exe installer |
| Ubuntu | apt-get install openssl |
Prepare configuration file
Download configuration file and put it in the folder, where you are going to store your SSH keys and certificates.
Open configuration file in a text editor of your choice and put domain names and/or IP addresses of your servers at the bottom, in the [ alt_names ] section. The important thing here is that these should be the public addresses, i.e. domain or IP address which you will be connecting to.
If you connect to your server using its public IP address (which happens to be 85.184.100.12), your configuration file should end with:
...

[ alt_names ]
IP.1 	= 85.184.100.12
Generate CA certificate
Open terminal and go to the directory with your configuration file, which will also be the root directory of where all your keys and certificates will be stored.
Create the directory structure for CA keys and certificates. The index.txt and serial files act as a flat file database to keep track of signed certificates.
mkdir ca ca/certs ca/crl ca/newcerts ca/private
chmod 700 ca/private
touch ca/index.txt
echo 1000 > ca/serial
Generate the CA root key, you will be asked to come up with a password to protect this key with.
openssl genrsa -aes256 -out ca/private/ca.key.pem 4096
chmod 400 ca/private/ca.key.pem
Use the root key (ca.key.pem) to create a root certificate (ca.cert.pem). Enter your private key pass phrase from the previous step and provide information that will be incorporated into your CA certificate (or hit Enter to use default value in square brackets).
openssl req -config openssl.cnf \
    -key ca/private/ca.key.pem \
    -new -x509 -days 7300 -sha256 -extensions v3_ca \
    -out ca/certs/ca.cert.pem
chmod 444 ca/certs/ca.cert.pem
Generate SSL/TLS certificate
Assuming you are still in the directory where your configuration file is, create the directory structure and generate a new server key.
mkdir jupyter jupyter/csr jupyter/certs jupyter/private
chmod 700 jupyter/private
openssl genrsa -out jupyter/private/ssl.key.pem 2048
chmod 400 jupyter/private/ssl.key.pem
Request certificate for your server. Provide information that will be incorporated into your SSL/TLS certificate (or simply hit Enter to use defaults).
openssl req -config openssl.cnf \
    -key jupyter/private/ssl.key.pem \
    -new -sha256 -out jupyter/csr/ssl.csr.pem
Finally, issue your server SSL/TLS certificate. You will be asked to provide your CA private key pass phrase that you used earlier, and confirm your intention to sign.
openssl ca -config openssl.cnf \
    -extensions server_cert -days 825 -notext -md sha256 \
    -in jupyter/csr/ssl.csr.pem \
    -out jupyter/certs/ssl.cert.pem
chmod 444 jupyter/certs/ssl.cert.pem
Certificates with validity period of more than 825 days will not be trusted on iOS 13 and above — see new security requirements.
Install CA certificate on your iOS device
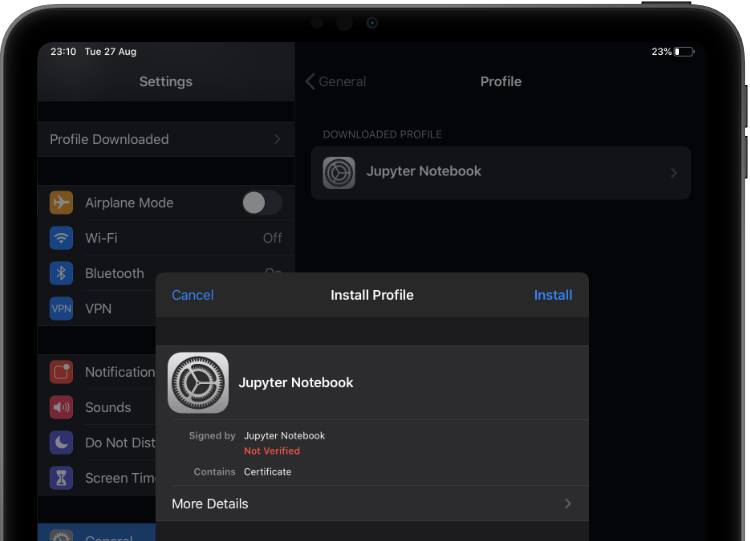
Install the CA certificate on your device (the one located at ca/certs/ca.cert.pem). You can e-mail it to yourself, share it via AirDrop or Dropbox — when you receive it, you will get an alert on your device saying that a new profile has been downloaded. Now go to Settings > Profile Downloaded (should appear at the top of the list), and install the certificate.
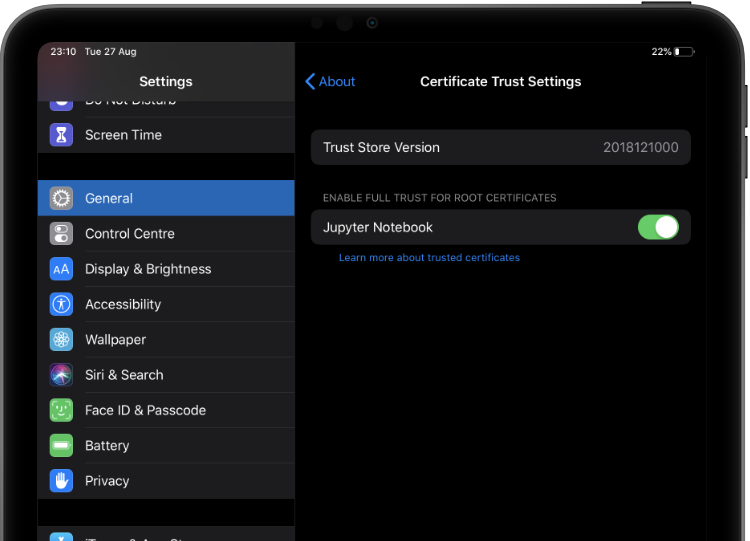
Enable full trust for installed certificate
You must also enable full trust for that CA certificate. Go to Settings > General > About > Certificate Trust Settings, and turn on trust for the certificate under the “Enable full trust for root certificates”.
Run Jupyter Notebook
Once CA certificate is trusted on the device, all certificates that were signed with it will be trusted too, including the one we generated for HTTPS, located at jupyter/certs/ssl.cert.pem. You can now use it when launching Jupyter Notebook by providing absolute paths to both key and certificate. If you generate all your certificate and keys in ~/.ssh/ folder, your paths will be:
jupyter notebook --certfile ~/.ssh/jupyter/certs/ssl.cert.pem --keyfile ~/.ssh/jupyter/private/ssl.key.pem
Alternatively, you can specify paths to key and certificate in Jupyter configuration file.
This material was based on OpenSSL Certificate Authority and Creating a Self-Signed SSL Certificate articles.